
Loading a CSV in Excel
You may want to open a CSV export of your timeline in Excel so you can edit it. To download one, click the Share button above your timeline, then the Spreadsheet item.
Before you go that route, export the timeline as an Excel file instead: in that same Spreadsheet Export dialog, set File Type to Excel (.xlsx) rather than Comma Separated Values (.csv). Excel files do not have the problem described below.
The Problem: Excel automatically reformats dates
If you open a CSV file in Excel, it converts the start_date and end_date columns into its own date format, which can cause problems when you import the CSV back into Preceden.

The Fix: Manually import the CSV into Excel
Opening the file directly leaves Excel to guess every column type. Importing it instead lets you say exactly how each column should be treated:
Create a new blank spreadsheet
Go to File > Import
Specify that you want to import a CSV file
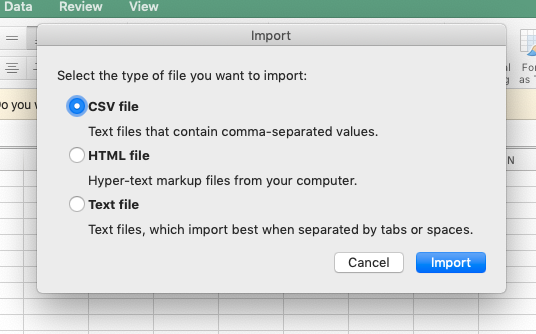
Select the CSV file you downloaded from Preceden
Tell Excel the file is Delimited
This means a particular character separates each column, in this case a comma:
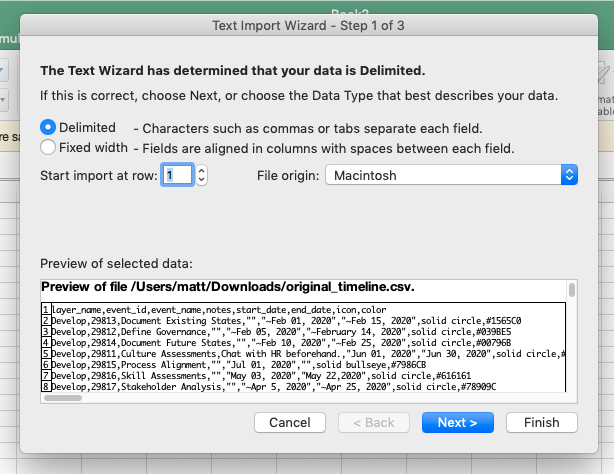
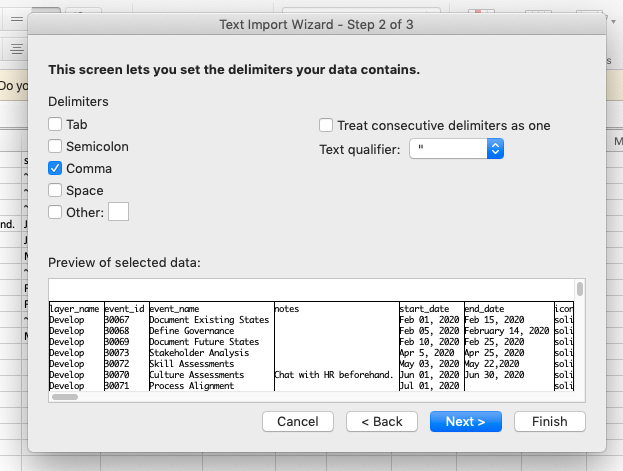
Choose Comma as the delimiter
Select the start_date column and set its column data format to Text
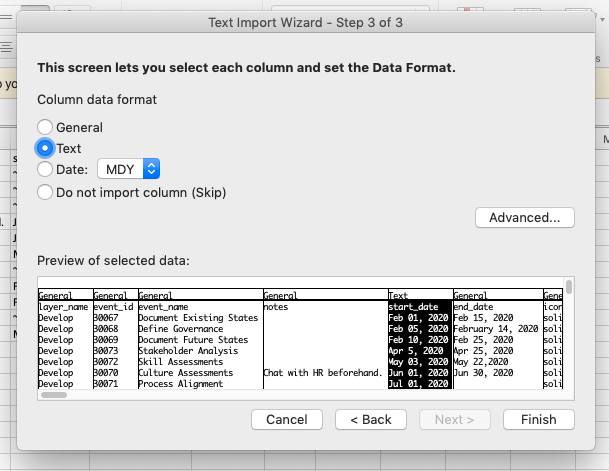
Do the same for the end_date column
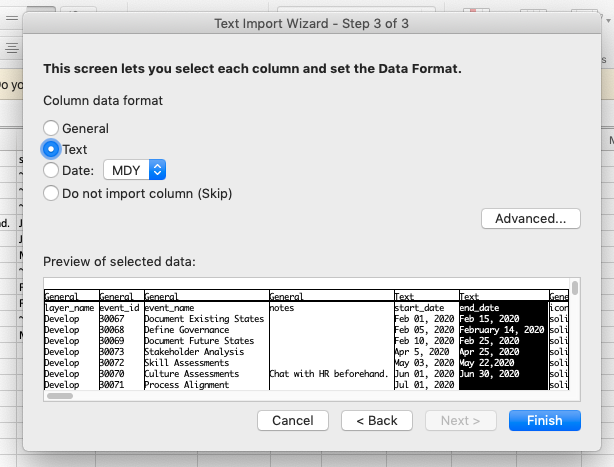
Click Finish
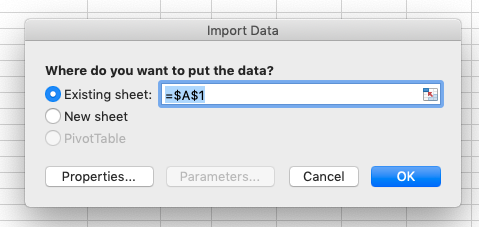
If Excel asks where to put the data, choose either Existing Sheet or New Sheet.
Excel now displays the start_date and end_date columns exactly as they are formatted in Preceden itself:

You can now edit those values without worrying that Preceden won't be able to read them when you re-import the file.
When you are done, save the sheet and import it back into your timeline. Leave the event_id column as it is: that is how the import knows to update your existing events instead of adding a copy of each one.
If what you actually want is to chart the timeline inside Excel rather than in Preceden, see our step-by-step guide to creating a timeline graph in Excel.