
Print Your Timeline Across Multiple Pages
You can print a Preceden timeline across several sheets of paper and tape the sheets together.
It takes a few extra steps. The multipage PDF lays your timeline out on a page 48 inches wide and 8.5 inches tall, and most printers shrink a page that wide to fit one sheet. The steps below split it into sheet-sized pieces instead.
The first tutorial below is for Mac users, the second for Windows users. Both start by exporting a PDF, so if that download fails or comes back with an error message, Troubleshooting PDF Export Issues works through the causes.
Some people have also had success printing large timelines on a plotter: Print on a Plotter.
For Mac Users
Click the Share button above your timeline and choose PDF.
Click More Options to expand it, set Paper Size to "Stretch across multiple sheets of paper", and click Download Now:
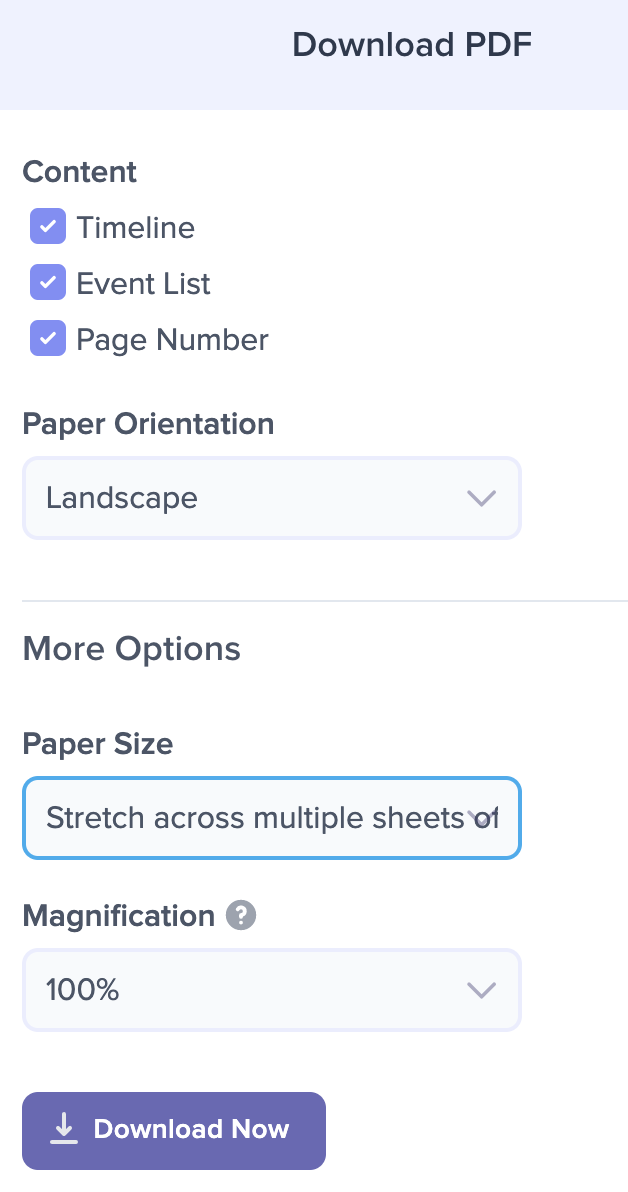
More Options is collapsed every time you open the dialog, so the Paper Size menu stays hidden until you expand it.
In this mode Preceden always includes the timeline, leaves out the event list and page numbers, and uses landscape orientation, so the Timeline, Event List and Page Number checkboxes and the Paper Orientation menu do not apply.
Use Preview to convert the PDF to an image. Click the File > Export menu:
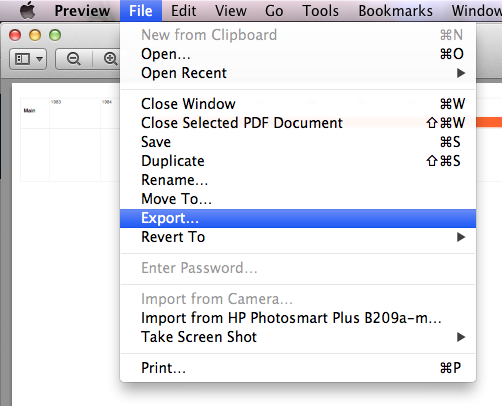
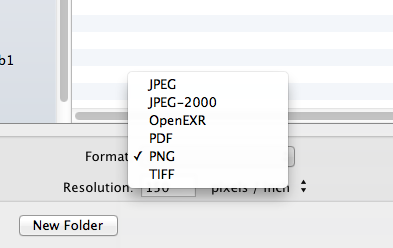
For the Format, choose PNG:
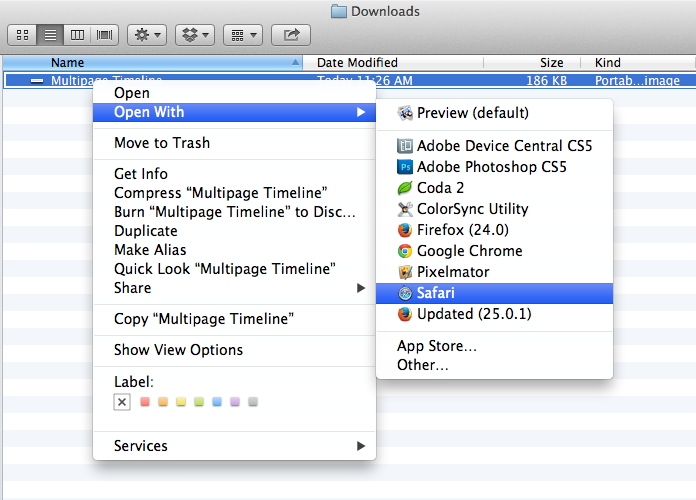
Open the PNG in Safari:
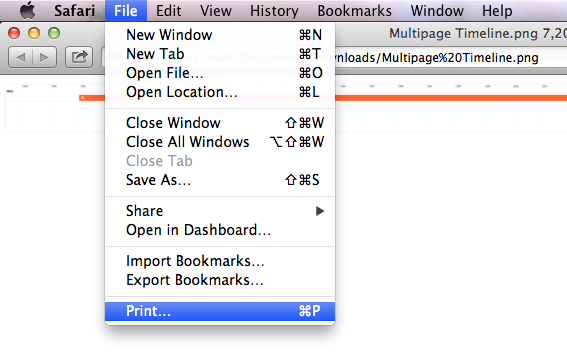
Click the File > Print menu:
Adjust the print options:
The page range and scale determine how many pages wide your printed timeline will be.
To print across four pages, set the page range from 1 to 4 and set the scale to 400%:
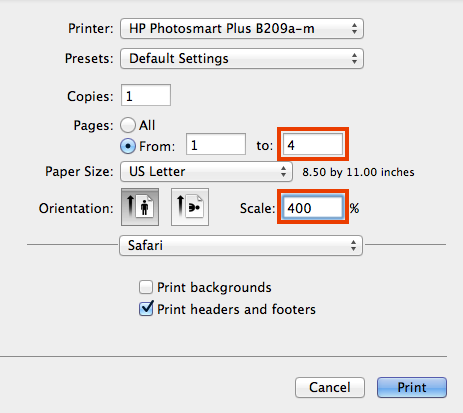
To print across eight pages, set the page range from 1 to 8 and set the scale to 800%.
This keeps your timeline at the correct magnification and stops your printer from printing blank pages.
If your timeline is multiple pages tall, you might need to double or triple the number of pages, but keep the scale the same.
Print your timeline.
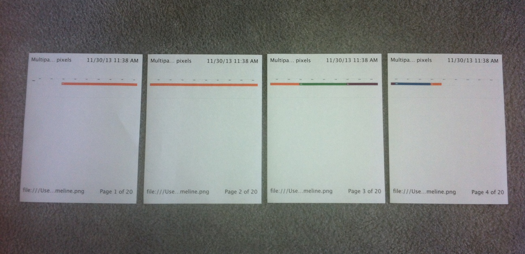
Printed across four pages, it looks like this:
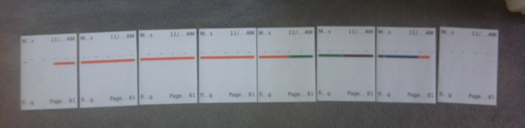
Printed across eight pages, it looks like this:
Finally, cut and tape the timeline together.
Once the pages are printed, cut and tape them together and display the timeline however you'd like.
For Windows Users
Printing PDFs across multiple pages in Windows is straightforward:
Click the Share button above your timeline and choose PDF.
Click More Options to expand it, set Paper Size to "Stretch across multiple sheets of paper", and click Download Now:
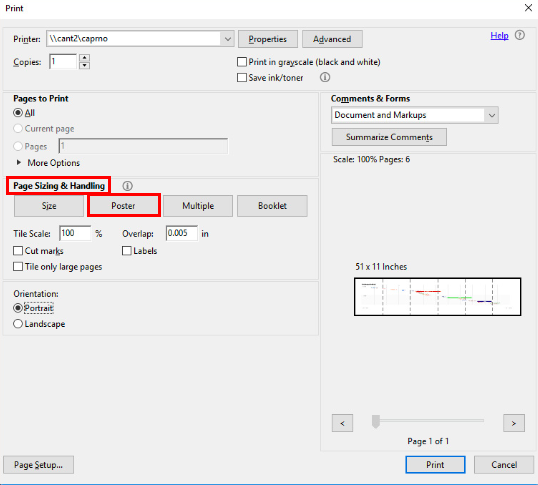
Open your PDF in Acrobat, then open the print dialog. Under Page Sizing & Handling, choose Poster, where you can set the scale to print the image at and how much the pages overlap:
Click Print, then cut and tape the pages together and display the timeline however you'd like.
